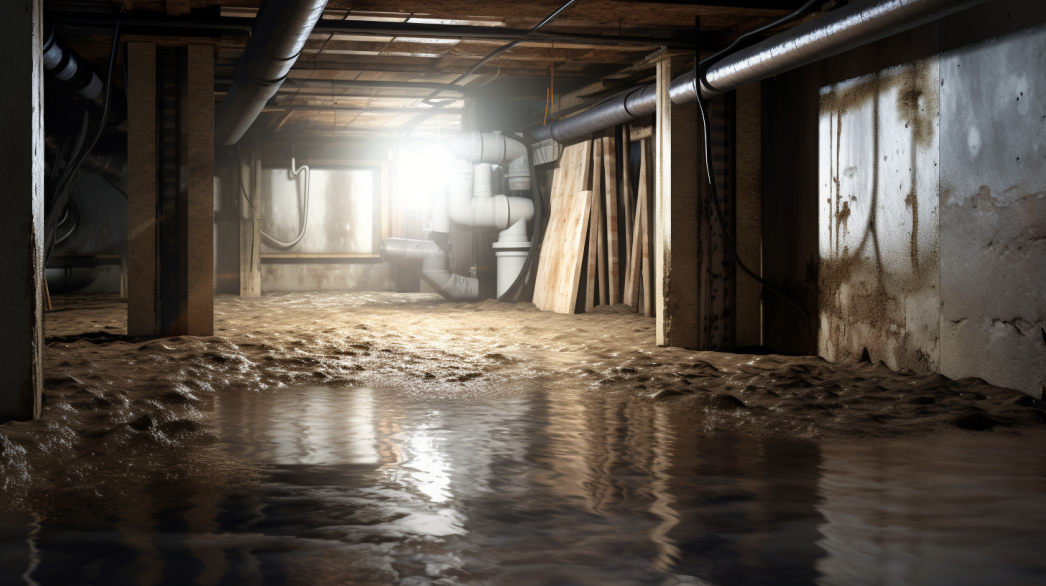
Bathrooms are one of the most moisture-prone areas in any home, and controlling this moisture is crucial to maintaining both the aesthetic and structural integrity of the space. Excess moisture can lead to a host of problems, including mold growth, structural damage, and poor indoor air quality, which can impact the health and safety of occupants.
Effective moisture control in bathrooms is essential for preventing these issues and ensuring that the bathroom remains a functional and pleasant environment. This involves understanding the sources of moisture, such as showers, baths, and sinks, and implementing strategies to manage humidity levels effectively. Proper moisture control not only preserves the appearance of fixtures and finishes but also extends their lifespan by preventing water-related deterioration.
In this blog post, we will explore the significance of moisture control in bathrooms and provide
practical tips and solutions to manage moisture effectively. From ventilation and waterproofing to regular maintenance practices, we will cover the essential aspects that homeowners and builders need to consider. By the end of this article, you will have a comprehensive understanding of how to protect your bathroom from moisture-related problems, ensuring a safe and comfortable environment for all.
What is a Moisture Barrier?
Moisture barriers play a critical role in safeguarding buildings from water damage. These barriers are essential components in construction and renovation projects, providing a protective layer that prevents moisture intrusion and helps maintain the integrity of structures.
Definition and Functionality
Explanation of a Moisture Barrier and Its Purpose
A moisture barrier, also known as a vapor barrier, is a protective layer designed to prevent the passage of water and moisture into building materials. Moisture barriers are crucial for protecting against the damaging effects of water infiltration, which can lead to structural deterioration, mold growth, and compromised indoor air quality.
Moisture barriers are used in various parts of a building, including walls, floors, and roofs. Their primary purpose is to create a seal that blocks water vapor and liquid water from entering and damaging the structure. By effectively controlling moisture levels, these barriers contribute to the longevity and durability of buildings, ensuring they remain safe and habitable.
How Moisture Barriers Work to Protect Against Water Damage
Moisture barriers function by creating an impermeable or semi-permeable layer that resists water passage. Depending on the material and application, they may be installed on the warm side of the insulation (in cooler climates) or on the exterior side (in warmer climates) to control moisture movement effectively. Here’s how they work:
- Blocking Water Vapor: Moisture barriers prevent water vapor from diffusing through walls and floors, reducing the risk of condensation within structural components.
- Resisting Liquid Water: They provide a physical barrier to liquid water, stopping it from penetrating into the building materials and causing damage.
- Enhancing Energy Efficiency: By controlling moisture, these barriers also help improve the energy efficiency of a building by maintaining consistent insulation performance.
Types of Moisture Barriers
Sheet Barriers (e.g., Polyethylene)
Sheet barriers are made from materials like polyethylene, a durable and flexible plastic that provides excellent moisture resistance. These barriers are typically used in construction as an underlayment or lining to prevent moisture migration through floors, walls, and roofs.
- Application: Commonly used under concrete slabs, in crawl spaces, and behind drywall.
- Benefits: Easy to install, cost-effective, and highly effective at blocking moisture.
Liquid-Applied Barriers
Liquid-applied barriers are coatings applied in a liquid form that cures to create a seamless, monolithic barrier against moisture. These are ideal for complex or irregular surfaces where sheet barriers might not fit snugly.
- Application: Used on roofs, decks, and exterior walls.
- Benefits: Seamless application, excellent adhesion, and flexibility, making them suitable for surfaces with multiple angles or penetrations.
Roll-On or Paint-On Barriers
Roll-on or paint-on barriers are applied using a roller or brush, creating a thick, continuous layer that acts as a moisture seal. These barriers are often used for above-grade applications where exposure to water is less severe.
- Application: Commonly applied to basement walls, foundation walls, and bathroom floors.
- Benefits: Easy application, can be used for both new construction and renovation projects, and provides a durable layer of protection.
In conclusion, understanding the function and types of moisture barriers is crucial for anyone involved in building construction or renovation. These barriers are essential for maintaining the structural integrity and safety of buildings by effectively controlling moisture intrusion and preventing water-related damage.
Benefits of Installing a Moisture Barrier in a Bathroom
Bathrooms are inherently moisture-rich environments, making them susceptible to a range of water-related issues. Installing a moisture barrier in a bathroom is a crucial step in maintaining its functionality, safety, and aesthetic appeal. Moisture barriers offer numerous benefits, from protecting structural elements to enhancing the durability of fixtures and finishes.
Protection Against Water Damage
Preventing Mold and Mildew Growth
One of the primary benefits of installing a moisture barrier in a bathroom is its ability to prevent mold and mildew growth. Bathrooms often experience high humidity levels due to frequent water use, making them ideal breeding grounds for mold and mildew. These fungi not only pose health risks, such as allergies and respiratory issues, but can also damage walls, ceilings, and floors.
Moisture barriers act as a seal, preventing water vapor from seeping into walls and subfloors where mold can thrive. By reducing moisture infiltration, these barriers help maintain a clean and healthy bathroom environment, protecting the well-being of occupants and preventing costly mold remediation efforts.
Protecting Structural Elements from Moisture
Water damage is a significant concern in bathrooms, as moisture can weaken structural elements over time. Moisture barriers provide a protective layer that prevents water from penetrating into critical components like wall studs, subfloors, and insulation.
By keeping these elements dry, moisture barriers help preserve the structural integrity of the bathroom. This protection is particularly important in preventing rot and decay in wood structures, which can lead to significant repairs if left unaddressed. Installing moisture barriers ensures that the bathroom remains safe and sound for years to come.
Enhanced Durability
Increasing the Lifespan of Bathroom Fixtures and Finishes
Bathroom fixtures and finishes, such as tiles, paint, and cabinetry, are susceptible to damage from prolonged exposure to moisture. A moisture barrier protects these surfaces by preventing water absorption, which can cause discoloration, warping, and deterioration.
By maintaining optimal moisture levels, moisture barriers help extend the lifespan of bathroom fixtures and finishes, preserving their appearance and functionality. This not only enhances the aesthetic appeal of the bathroom but also reduces the need for frequent repairs or replacements, providing long-term cost savings.
Improving Overall Bathroom Hygiene and Safety
Moisture barriers contribute to improved hygiene and safety in bathrooms by minimizing conditions that promote bacterial growth and other contaminants. Excess moisture can create slippery surfaces and encourage the proliferation of harmful microorganisms, posing safety risks to users.
By effectively managing moisture levels, barriers help maintain a drier, safer bathroom environment. This is especially important in areas like shower stalls and around bathtubs, where water exposure is highest. Improved hygiene and safety enhance the overall user experience, ensuring the bathroom is a comfortable and welcoming space.
In conclusion, installing a moisture barrier in a bathroom offers significant benefits, from protecting against water damage to enhancing the durability of fixtures and finishes. By investing in moisture control, homeowners can ensure their bathrooms remain functional, safe, and visually appealing for the long term.
Preparing for Installation
Proper preparation is essential for successfully installing a moisture barrier in a bathroom. By thoroughly assessing the space and selecting the right materials, you can ensure that the moisture barrier provides effective protection and enhances the longevity of your bathroom.
Initial Assessment
Identifying High-Moisture Areas
The first step in preparing for moisture barrier installation is to identify areas in the bathroom that are particularly susceptible to high moisture levels. These areas typically include:
- Showers and Tubs: These are the primary sources of moisture in a bathroom due to frequent water exposure. Moisture barriers are essential in these areas to prevent water from seeping into the walls and subfloors, where it can cause damage.
- Sinks and Toilets: While not as moisture-intensive as showers, sinks and toilets can still contribute to humidity and occasional leaks. Ensure that the areas around these fixtures are adequately protected.
- Flooring: Bathrooms are prone to water spills and splashes, making the floor a high-risk area for moisture accumulation. Installing a moisture barrier beneath the flooring can help prevent water damage and extend the lifespan of the materials.
By identifying these high-moisture areas, you can strategically place moisture barriers to maximize their effectiveness.
Checking for Existing Moisture Damage or Leaks
Before installing a moisture barrier, it is crucial to inspect the bathroom for any existing moisture damage or leaks. Look for signs such as:
- Water Stains or Discoloration: These can indicate water penetration behind walls or under flooring.
- Peeling Paint or Wallpaper: This is often a sign of excessive moisture buildup.
- Mold or Mildew: These are clear indicators of persistent moisture issues that need to be addressed.
- Soft or Warped Surfaces: Structural elements like drywall or wood that feel soft or appear warped may have been compromised by moisture.
Identifying and repairing any existing damage or leaks before installing a moisture barrier is vital to ensure that the barrier functions effectively and provides long-term protection.
Selecting the Right Moisture Barrier
Considerations for Barrier Material
Choosing the right moisture barrier material is crucial for effective moisture control. Consider the following factors:
- Thickness: Thicker barriers generally provide better protection against moisture penetration but may be more challenging to install. Balance thickness with ease of application to meet your specific needs.
- Permeability: The permeability of a moisture barrier refers to its ability to allow water vapor to pass through. Select a barrier with the appropriate permeability rating for your climate and specific bathroom conditions to prevent condensation and related issues.
- Durability: Choose a material that can withstand the bathroom's conditions, including temperature fluctuations and potential chemical exposure from cleaning products.
Compatibility with Different Surfaces
Ensure that the moisture barrier you select is compatible with the surfaces in your bathroom. Common surfaces include:
- Drywall: For walls and ceilings, choose a moisture barrier that adheres well to drywall and provides a seamless seal.
- Concrete: When installing barriers on concrete floors or walls, select materials that can bond effectively with the substrate and accommodate potential movement or settling.
- Tile: If installing a moisture barrier under tile, ensure it can withstand the weight and adhesive properties of tile installations.
By considering these factors, you can select a moisture barrier that provides optimal protection and complements your bathroom's construction materials.
In conclusion, preparing for moisture barrier installation involves a thorough assessment of high-moisture areas, checking for existing damage, and selecting the right materials for your specific needs. Proper preparation ensures that the moisture barrier performs effectively, protecting your bathroom from water-related issues and extending its lifespan.
Tools and Materials Needed
Installing a moisture barrier in a bathroom requires the right tools and materials to ensure an effective and seamless installation. Using the appropriate equipment and supplies helps protect your bathroom from moisture-related damage and ensures a successful project.
Essential Tools
Utility Knife
A utility knife is an indispensable tool for any moisture barrier installation project. It is used for cutting the barrier material to fit precisely around fixtures, corners, and edges. A sharp utility knife ensures clean cuts and minimizes material waste, allowing for a more efficient installation process.
Tape Measure
Accurate measurements are crucial for a successful installation. A tape measure helps you determine the exact dimensions of the areas where the moisture barrier will be installed. By taking precise measurements, you can cut the barrier material to fit perfectly, ensuring comprehensive coverage and optimal moisture protection.
Roller or Brush (for Liquid Barriers)
For liquid-applied moisture barriers, a roller or brush is essential for applying the barrier evenly across surfaces. Rollers are ideal for larger, flat surfaces, while brushes can be used for detailed work and tight spaces. Proper application ensures that the barrier forms a consistent, protective layer, preventing moisture from seeping through gaps or inconsistencies.
Safety Equipment (Gloves, Mask)
Safety should always be a priority during installation. Wearing gloves protects your hands from cuts and exposure to chemicals, while a mask helps prevent inhalation of dust and fumes from adhesives and barrier materials. Using the appropriate safety equipment ensures a safer working environment and reduces the risk of injury.
Required Materials
Moisture Barrier Material
Selecting the right moisture barrier material is crucial for effective moisture control. The material you choose will depend on the specific needs of your bathroom and the surfaces being covered. Options include polyethylene sheets for underlayment, liquid-applied barriers for seamless coverage, and roll-on or paint-on barriers for ease of application.
Sealing Tape or Adhesive
Sealing tape or adhesive is used to secure the moisture barrier material in place and ensure a watertight seal. For sheet barriers, use specialized sealing tape to join seams and edges, preventing moisture from penetrating through gaps. For liquid barriers, select an appropriate adhesive to enhance the bond between the barrier and the surface, ensuring lasting protection.
Cleaning Supplies (Broom, Vacuum)
Before installing a moisture barrier, it is essential to clean the surfaces thoroughly. Use a broom to sweep away loose debris and a vacuum to remove dust and dirt from floors and walls. A clean surface ensures better adhesion of the barrier material, preventing gaps and bubbles that could compromise moisture protection.
In conclusion, having the right tools and materials is critical for a successful moisture barrier installation. By using these essential tools and required materials, you can ensure that your bathroom is adequately protected against moisture-related damage, contributing to a safe and long-lasting environment.
Installation Process
Installing a moisture barrier in your bathroom is a crucial step in preventing water damage and ensuring the durability of your fixtures and finishes. A systematic approach to installation ensures that the moisture barrier is effective in providing the necessary protection. Here is a step-by-step guide to help you through the process.
Step 1 - Surface Preparation
Cleaning the Bathroom Surfaces Thoroughly
The first step in installing a moisture barrier is to clean the bathroom surfaces meticulously. This involves removing all dirt, dust, and grease from walls and floors to ensure that the moisture barrier adheres properly. Use a mild detergent and water to wash the surfaces, followed by a rinse with clean water. Pay special attention to corners, seams, and any other areas where debris may accumulate.
Once cleaned, allow the surfaces to dry completely. Moisture or residue left on the surfaces can compromise the adhesive properties of the moisture barrier, leading to gaps or peeling over time.
Ensuring Surfaces are Dry and Free of Debris
Before proceeding with the installation, confirm that all surfaces are completely dry. Moisture trapped between the surface and the barrier can lead to mold growth and adhesion issues. Use fans or dehumidifiers if necessary to accelerate the drying process.
Inspect the surfaces for any remaining debris, and vacuum or wipe them away as needed. A clean and dry surface is crucial for achieving a tight seal and maximizing the barrier’s effectiveness.
Step 2 - Measuring and Cutting the Barrier
Accurate Measurement Techniques for Fitting
Accurate measurements are essential for ensuring that the moisture barrier fits perfectly. Use a tape measure to determine the height and width of the walls and floors where the barrier will be applied. Measure twice to ensure accuracy and reduce the risk of errors.
Make a note of any protrusions or fixtures, such as pipes and fittings, and measure their dimensions carefully. Proper measurement ensures that the barrier can be cut to accommodate these features without leaving gaps.
Cutting the Barrier to Size
Once measurements are complete, transfer them to the moisture barrier material. Use a utility knife or scissors to cut the barrier to the appropriate size, following your measurements closely. For corners and fixtures, make precise cuts that will allow the barrier to fit snugly around these areas.
When cutting the barrier, ensure that you leave a few extra inches for overlap at the seams and edges. This additional material will help create a secure seal and prevent moisture infiltration.
Step 3 - Installing the Moisture Barrier
Applying the Barrier to Walls and Floors
Begin by applying the moisture barrier to the walls. Start at the bottom and work your way up, smoothing the material as you go to eliminate air bubbles and wrinkles. Use a roller or brush for liquid barriers to ensure even coverage.
For sheet barriers, align the material with the wall and press firmly to adhere. Continue applying the barrier to the floors, ensuring that the material covers the entire surface area without gaps.
Ensuring a Tight Fit and Proper Adhesion
Ensure that the moisture barrier is tightly fitted to the surfaces, with no gaps or loose areas. Press the material firmly against the surface and use a roller to smooth out any bubbles or creases. Proper adhesion is key to preventing moisture from seeping behind the barrier and causing damage.
Overlapping Seams and Sealing with Tape or Adhesive
To create a continuous moisture barrier, overlap the seams of the material by at least a few inches. Use sealing tape or adhesive to secure the overlaps, creating a watertight seal. Pay close attention to corners and edges, where moisture is most likely to penetrate.
Ensure that all seams and edges are thoroughly sealed to prevent moisture from infiltrating the protected areas. Regularly check the seams during the installation process to confirm that they remain securely in place.
In conclusion, following a careful installation process is essential for ensuring the effectiveness of your moisture barrier. By preparing surfaces, accurately measuring and cutting the material, and applying it with precision, you can protect your bathroom from moisture-related damage and enjoy a durable, long-lasting space.
FAQs
Contact Bull City Crawlspace Today!
Bull City Crawlspace will do everything we can to ensure your experience with us is excellent.
Request A FREE Estimate
Request a Free Estimate Form
Checkout Recent Post
Got a Question? We’re Here to Help.
You can arrange an appointment or make an enquiry by phone or email, orget in touch to us via our contact form.

